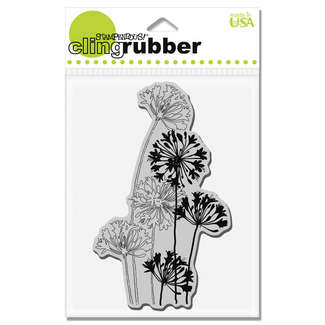
We received a big order of stamps from Stampendous and House Mouse late last week. Here are some of the new images.
Showing posts with label Stampendous. Show all posts
Monday, February 1, 2016
Sunday, November 16, 2014
What's Shaking?
I made this cute card today after I demoed the Scrapbook Adhesives adhesive sheets designed to be used with dies so that the back of the die is covered in adhesive another alternative to the glue pens and dot tape runners. Seemed to work OK and was definitely easy to cut with my Big Shot. I used the Memory Box die Frostyville Border. Here is a video on other things you can do with it.
I had this Stampendous PenPattern Penguin already colored up with my Tombow Markers (on Tim Holtz watercolor cardstock) so the card was pretty quick to do. I fussy cut out my penguin and put him on an Action Wobble so he dances whenever the card is moved. I stamped a Penny Black sentiment with white embossing powder. I added some Warm Highlight Glitter Ritz glitter to the snow and the penguin's scarf and some Snow Writer for the penguin to stand on. Such a fun card if I do say myself!
Sunday, November 2, 2014
Pretty Poinsettia - Chameleon markers!
I bought myself a set of the new alcohol Chameleon markers a week or so back and have been taking them home with me to play with. I normally don't craft at home so you know I was excited about these! I got to play with these markers when I was at CHA in January and really loved them then and I love them even more now! Here is my first completed card with them. Very happy with it and I only used 3 markers! I cut out the poinsettia after I colored it and added Diamond Stickles along the edges for some bling. Watch for more samples soon. I am excited to say Crafty Capers is the first retailer on Vancouver Island to carry these fabulous new markers and we have a great selection in stock now but they are selling quickly. The Crafty Capers November demo is going to feature Chameleon markers. The demo runs Saturday Nov 15 10:30 am - 12:30 pm. It is drop in and free. No need to preregister.
Supplies: Chameleon markers, Stampendous Poinsettia duo stamp, MME pattern paper, Bazzill cardstock, Diamond Stickles & ribbon by Viviant.
Monday, June 30, 2014
Dance
Here is another sample from my demo on Saturday. I call this technique the watercolor technique because you stamp your image on watercolor paper with die ink then spray it with water to make the colors run a bit to give a soft look. I used my much used Stampendous agapanthus stamp for about the 1 millionth time! I used Distress Inks for the background and Mementolux for the sentiment (sentiment is by Penny Black). I matted the watercolor paper with some glitter paper and punched my butterfly out of the watercolor paper to show just a bit more of the glitter paper!
I am hoping now the shop painting is completed - yeah! I will have a bit more time to "play" stay tuned for more crafty projects!
Friday, September 27, 2013
Cards for Cancer fundraiser
Crafty Capers is having a Cards for Cancer fundraiser next weekend. Our classes are all sold out however we are still taking registration for class kits. Each class kit is $4.00 and all monies will be going to Ovarian Cancer Canada.
These card kits will be fairly simple you will need to provide your own adhesive, scissors and, in some cases, coloring materials and glitter but all the papers and embellishments will be cut and provided for you in your kit along with instructions. Deadline to register for these kits is tomorrow, Saturday Sept 28. Please contact the store if you are interested. There are 8 kits in total.
Saturday Oct 5 is coincidently, World Card Day it might be a fun to order some card kits, gather some friends have a mini party while making up your cards on that day!
Here is my "Saturday" Cards for Cancer card. Fairly simple, I used a new Wrapped in Joy Couture Creations embossing folder, a Stampendous clear sentiment, a Dee's tree die with Glitter Ritz plus some little Memory Box bird dies.
Special thanks goes to Sharron L for helping me out with this card as well as cutting out all the birds for the kits.
These card kits will be fairly simple you will need to provide your own adhesive, scissors and, in some cases, coloring materials and glitter but all the papers and embellishments will be cut and provided for you in your kit along with instructions. Deadline to register for these kits is tomorrow, Saturday Sept 28. Please contact the store if you are interested. There are 8 kits in total.
Saturday Oct 5 is coincidently, World Card Day it might be a fun to order some card kits, gather some friends have a mini party while making up your cards on that day!
Here is my "Saturday" Cards for Cancer card. Fairly simple, I used a new Wrapped in Joy Couture Creations embossing folder, a Stampendous clear sentiment, a Dee's tree die with Glitter Ritz plus some little Memory Box bird dies.
Special thanks goes to Sharron L for helping me out with this card as well as cutting out all the birds for the kits.
Saturday, September 14, 2013
Resist Demo today!
Not a great photo however this is another resist demo sample. This baby is STUNNING in real life lots of blues and purples with contrasting with the Silver Dollar embossing powder and the card was easy and quick to make another bonus.
The stamp is by Stampendous and I used Distress markers to make the background on Tim Holtz's new watercolor cardstock. I am also quite impressed with the watercolor cardstock easy to stamp on even with a detailed stamp. I will be getting myself another package.
Hope to see you at the demo today: Saturday Sept 14 10:30 - 12:30 and, as usual, its free!
The stamp is by Stampendous and I used Distress markers to make the background on Tim Holtz's new watercolor cardstock. I am also quite impressed with the watercolor cardstock easy to stamp on even with a detailed stamp. I will be getting myself another package.
Hope to see you at the demo today: Saturday Sept 14 10:30 - 12:30 and, as usual, its free!
Tuesday, September 10, 2013
A snowy day
I've been busy working on Christmas/Winter card samples with some of the new product that has been arriving recently. I have wanted to play with the new Memory Box Swirling Snowflakes die ever since it came in back in July and finally, I set some time aside to play with it.
I began by cutting the die out with Silver Mirrorcard. I needed the metal shim to cut it in my Big Shot but it cut out beautifully!!! Then I stamped the Stampendous Polar Ride stamp on Bazzill cardstock and colored it with my Tombow markers then cut the image out. I found a blue card base and cut a piece of Be Creative tape to fit the front of the card (4.25x5.5) and put it on the card front. I carefully laid down the snowflake die cut then I added Cool Highlight Glitter Ritz over the remaining exposed tape for a sparkly sky. I stamped the sentiment by Hero Arts on a leftover bit the same color as my main card (unglittered) and attached it as shown then I mounted my polar bears. Really happy with how this card turned out and happy I got to reuse an older Christmas stamp from a few years back.
Just a reminder that Crafty Capers will be having a Glitter Ritz free demo, tomorrow, Wednesday Sept 11 @1 pm. No need to preregister just drop in between 1 and 3 pm it is recommended you bring a notebook to jot down all the glitter tips and techniques.
I began by cutting the die out with Silver Mirrorcard. I needed the metal shim to cut it in my Big Shot but it cut out beautifully!!! Then I stamped the Stampendous Polar Ride stamp on Bazzill cardstock and colored it with my Tombow markers then cut the image out. I found a blue card base and cut a piece of Be Creative tape to fit the front of the card (4.25x5.5) and put it on the card front. I carefully laid down the snowflake die cut then I added Cool Highlight Glitter Ritz over the remaining exposed tape for a sparkly sky. I stamped the sentiment by Hero Arts on a leftover bit the same color as my main card (unglittered) and attached it as shown then I mounted my polar bears. Really happy with how this card turned out and happy I got to reuse an older Christmas stamp from a few years back.
Just a reminder that Crafty Capers will be having a Glitter Ritz free demo, tomorrow, Wednesday Sept 11 @1 pm. No need to preregister just drop in between 1 and 3 pm it is recommended you bring a notebook to jot down all the glitter tips and techniques.
Sunday, August 18, 2013
Party Penguins
An English cousin (baby Grace) turns 1 shortly and I was a bit stumped about what sort of card is suitable for a 1 year old. I was thinking about something "House Mouse" but then remembered Grace loves the otters and penguins at the zoo and since I do not own any otter stamps, and don't believe I have EVER seen one, a penguin card it was!
I used the Jumbo Penguins (again) from Stampendous and did some paper piecing for a super quick and easy card. I used Doodlebug Fruitstand pattern paper for a fun partyish color scheme. The lacy border around the penguins is called Fancy Weave by Spellbinders and the sentiment is by Penny Black.
Just as an FYI the store is open today (Sunday Aug 18) 10 am - 4 pm due to our Mixed Media classes going on today shoppers are welcome! :)
I used the Jumbo Penguins (again) from Stampendous and did some paper piecing for a super quick and easy card. I used Doodlebug Fruitstand pattern paper for a fun partyish color scheme. The lacy border around the penguins is called Fancy Weave by Spellbinders and the sentiment is by Penny Black.
Just as an FYI the store is open today (Sunday Aug 18) 10 am - 4 pm due to our Mixed Media classes going on today shoppers are welcome! :)
Thursday, August 15, 2013
Tis the Season....
I know it just seems wrong to some people, but we are starting to see people popping by Crafty Capers to see what we have for Christmas stamps. There are quite a few organized types out there who do their Christmas cards and projects months in advance and then sit back and laugh at us (me) who are running around in a panic at the last minute! Never fear, I have NOT changed my ways I usually make a few Christmas cards this time of year then feel all smug because I am "well on my way to getting my cards done" then do no more until December 15!
These penguins are by Stampendous and came in a couple of weeks ago. I have a bit of a penguin thing so knew I would be buying them when I got a few spare minutes.
This card is based on a sketch over at the Merry Monday Challenge blog and the card came together very quickly. I colored the penguins with my Prisma pencil crayons and used the penguin mask that is included with penguin stamp set to sponge Distress inks around the outside of the penguins without getting my penguins inky. I cut the penguins out using a Spellbinder ornament die, used a Stampendous sentiment, Stampendous Fun Flock (white and green). I added Glossy Accents to the penguin's beaks and feet for some extra interest. I made the snow they are standing on glittery by adding some Stickles Glitter Glue.
The snowflake background is also a stamp by Stampendous included with the penguins.
My teaching schedule is a bit lighter at the moment so hopefully I will have some more time to get some playing done!
Thanks for stopping by!
Stamps used: Jumbo Penguin Snow & Tis the Season clear set both sets by Stampendous
Inks: Versafine Onyx black & Distresss Tumbled Glass & Weathered Wood
Other Supplies: Fun Flock, gems, ribbon, Glossy Accents, Crystal Stickles & Prima Pencil Crayons
These penguins are by Stampendous and came in a couple of weeks ago. I have a bit of a penguin thing so knew I would be buying them when I got a few spare minutes.
This card is based on a sketch over at the Merry Monday Challenge blog and the card came together very quickly. I colored the penguins with my Prisma pencil crayons and used the penguin mask that is included with penguin stamp set to sponge Distress inks around the outside of the penguins without getting my penguins inky. I cut the penguins out using a Spellbinder ornament die, used a Stampendous sentiment, Stampendous Fun Flock (white and green). I added Glossy Accents to the penguin's beaks and feet for some extra interest. I made the snow they are standing on glittery by adding some Stickles Glitter Glue.
The snowflake background is also a stamp by Stampendous included with the penguins.
My teaching schedule is a bit lighter at the moment so hopefully I will have some more time to get some playing done!
Thanks for stopping by!
Stamps used: Jumbo Penguin Snow & Tis the Season clear set both sets by Stampendous
Inks: Versafine Onyx black & Distresss Tumbled Glass & Weathered Wood
Other Supplies: Fun Flock, gems, ribbon, Glossy Accents, Crystal Stickles & Prima Pencil Crayons
Tuesday, June 11, 2013
New Stampendous!
Sorry for the lack of posts recently. I usually blog in the evenings and at the moment I am madly trying to wrestle weeds and get my veggie garden planted after work (planted batch #2 of beets and picked the strawberries tonight).
We got a batch of Stampendous stamps, glitter and Stufftainers (storage) in today and yesterday we received a box of Ranger goodies including but limited to Distress Ink pads, markers & stains plus Dylusions spray inks, Liquid Pearls and Cut N Dry foam.
Here are some of the Stampendous images we received today.
Stop by the store soon for best selection!
We got a batch of Stampendous stamps, glitter and Stufftainers (storage) in today and yesterday we received a box of Ranger goodies including but limited to Distress Ink pads, markers & stains plus Dylusions spray inks, Liquid Pearls and Cut N Dry foam.
Here are some of the Stampendous images we received today.
Stop by the store soon for best selection!
Saturday, May 4, 2013
Playing with Inkagold
I have bought a few colors of Vivadecor Inkagold metallic paste over the past month or so but have not really done anything with them so thought I would sit down and do some experimenting. Some experiments turned out well, some not so much! LOL Inkagold seems like a fun new product and I hope I have more time to do some experimenting soon.
I used my Tombow markers (green) and Violet Inkagold and Gold Inkagold to watercolor my Stampendous Violets image on watercolor paper with my waterbrush. I fussy cut out the image. I embossed a piece of white cardstock with my Tim Holtz brick folder then used my finger to rub Haematite Inkagold over the embossed areas. I matted the pieces as shown and I finished off the card with some violet satin ribbon and a white pearl.
Hope everyone has a great weekend!
Thanks everyone for stopping by!
I used my Tombow markers (green) and Violet Inkagold and Gold Inkagold to watercolor my Stampendous Violets image on watercolor paper with my waterbrush. I fussy cut out the image. I embossed a piece of white cardstock with my Tim Holtz brick folder then used my finger to rub Haematite Inkagold over the embossed areas. I matted the pieces as shown and I finished off the card with some violet satin ribbon and a white pearl.
Hope everyone has a great weekend!
Thanks everyone for stopping by!
Saturday, March 16, 2013
Secret Garden & Bluebirds
I had a play date last weekend and since I was pretty tired I opted to color a bunch of images since I can do that with very little brain power. I did not have a particular plan in mind while I was coloring however I opted to got outside of my usual comfort zone and color with Prismacolor pencil crayons (in my comfort zone) and odorless mineral spirits (outside my comfort zone). I also, used colors I normally pass over especially for nature images.
I brought my colored image to work with me on Tuesday intending to throw it in the recycling bin but then a stack of Graphic 45 Secret Garden paper caught my eye. It all matched my colored image!! Add some Graphic 45 flowers and... after that, the card came together pretty quickly!
I am very happy with how the card turned out now gotta find someone who is worthy of this card! ;)
Thank you to everyone who stops by and a special thanks for the comments I appreciate everyone!
Bluebird Branch stamp by Stampendous.
I brought my colored image to work with me on Tuesday intending to throw it in the recycling bin but then a stack of Graphic 45 Secret Garden paper caught my eye. It all matched my colored image!! Add some Graphic 45 flowers and... after that, the card came together pretty quickly!
I am very happy with how the card turned out now gotta find someone who is worthy of this card! ;)
Thank you to everyone who stops by and a special thanks for the comments I appreciate everyone!
Bluebird Branch stamp by Stampendous.
Wednesday, February 27, 2013
Tombow coloring
Happy Wednesday everyone! Hope everyone is having a great week. I am pretty excited because I am headed out on a "girls trip" tomorrow for a couple of days. Should be oodles of fun. Let's hope the weather is decent since we will be staying at a place on the beach (I know, I already live near a beautiful beach but this one is a different beach :) )
I was in the mood to color with my Tombow markers a few days ago and made this card. Thankfully, don't really need a Get Well card but the sentiment seemed to fit best with the card.
The Stampendous rose was embossed with Ranger Seafoam white embossing powder on a piece of kraft cardstock then I colored my Tombow markers being careful not to overblend or else the cardstock will warp and pill. I finished the coloring by using my Distress Picket Fence marker to add some highlights.
I matted everything as shown and stamped the Hero Arts sentiment. I also added the ribbon and some pink rhinestones for some extra interest.
I was in the mood to color with my Tombow markers a few days ago and made this card. Thankfully, don't really need a Get Well card but the sentiment seemed to fit best with the card.
The Stampendous rose was embossed with Ranger Seafoam white embossing powder on a piece of kraft cardstock then I colored my Tombow markers being careful not to overblend or else the cardstock will warp and pill. I finished the coloring by using my Distress Picket Fence marker to add some highlights.
I matted everything as shown and stamped the Hero Arts sentiment. I also added the ribbon and some pink rhinestones for some extra interest.
Thursday, February 7, 2013
New Arrivals - Stampendous!
Lots of great new Stampendous stamps arrived today! Here are just some of the new stamps in stock:
Don't forget the Free Tombow marker demo on Saturday!
![]() |
| Good 'ol Agapanthus Cluster is back in stock! Kathy is using this one in her Distress Ink class. |
![]() |
| Bluebird Branch |
![]() |
| For those who love steampunk! |
![]() |
| BRAND NEW Jumbo daisy! |
![]() |
| Railroad poster |
![]() |
| Neat and different stamp! I can totally see these shoes red and glittery! |
Monday, January 14, 2013
Thanks!
Thanks to everyone who stopped by for the demo on Saturday! We had a full house for most of the morning!
Here is another of the sample cards from the Ranger Alcohol ink demo. I made a second card of this type because I needed a Thank You card last week. This card came together so quickly makes me wonder why I don't use Alcohol inks on my cards more often!
I started this card by stamping and embossing this flower image with white embossing powder on glossy cardstock then I pounced Raisin and Terra Cotta alcohol inks over top of the entire piece of glossy cardstock. The alcohol inks are lighter on the white embossing powder so you get a ghost-like image. Very pretty in my opinion!
I matted the image as shown and added some May Arts twine then I stamped the thank you background with Canteloupe Memento ink. I finished off the card with some white pearls that I custom colored using more Raisin alcohol ink.
Alcohol ink: Raisin & Terra Cotta
Other ink: Memento Cantaloupe
Stamps: Stampendous Ranunculas Field; Hero Arts So Many Thanks
Other: Hero Arts pearls, Ranger Seafoam white embossing powder, May Arts twine
Here is another of the sample cards from the Ranger Alcohol ink demo. I made a second card of this type because I needed a Thank You card last week. This card came together so quickly makes me wonder why I don't use Alcohol inks on my cards more often!
I started this card by stamping and embossing this flower image with white embossing powder on glossy cardstock then I pounced Raisin and Terra Cotta alcohol inks over top of the entire piece of glossy cardstock. The alcohol inks are lighter on the white embossing powder so you get a ghost-like image. Very pretty in my opinion!
I matted the image as shown and added some May Arts twine then I stamped the thank you background with Canteloupe Memento ink. I finished off the card with some white pearls that I custom colored using more Raisin alcohol ink.
Alcohol ink: Raisin & Terra Cotta
Other ink: Memento Cantaloupe
Stamps: Stampendous Ranunculas Field; Hero Arts So Many Thanks
Other: Hero Arts pearls, Ranger Seafoam white embossing powder, May Arts twine
Tuesday, December 25, 2012
Merry Christmas!
Just a quick (scheduled) post to wish everyone a Merry Christmas. It's been pretty busy around here what with gift wrapping, baking, cleaning, shopping not to mention me having to get caught up on Crafty Caper's data entry so we can begin inventory in the next day or so. Here is a card I made during a recent play date. The poinsettia (hmmmm I see a trend here) background stamp is by Stampendous and I stamped it on watercolor cardstock then embossed it with Ranger Seafoam white powder. I used my Distress markers to color the images (quite difficult to see the white on white when you are blind in one eye!!) however I kept at it! I stamped the Stampendous saying in the same white embossing powder and voila card completed! You can't see it in this photo but I also added some Diamond Stickles to the flower for some extra wow!Merry Christmas everyone!
Victoria
Wednesday, December 5, 2012
A snowy blue scene
Just quickly stopping in to show off yet another Christmas card I got whipped up todya! I am making some progress on my Christmas cards...
This one layer card is perfect for mailing no chance of getting dinged for being over weight or too fat!
I cut out a Spellbinder square window from a piece of scrap cardstock and taped the mask to my main cardstock. Using my Colorbox stylus wand and sponge tip is sponged Hero Arts Soft Pool around the edges of the square opening then I cut out a Memory Box die (Country Landscape) and taped it within the square to act as a stencil. I used Distress inks Tumbled Glass and Broken China to define the country scene then I pulled the square window and landscape masks to reveal a gorgeous square with a little scene on it. I finished the card by stamping a Stampendous sentiment and some Penny Black snowflakes. Easy Peasy!
This one layer card is perfect for mailing no chance of getting dinged for being over weight or too fat!
I cut out a Spellbinder square window from a piece of scrap cardstock and taped the mask to my main cardstock. Using my Colorbox stylus wand and sponge tip is sponged Hero Arts Soft Pool around the edges of the square opening then I cut out a Memory Box die (Country Landscape) and taped it within the square to act as a stencil. I used Distress inks Tumbled Glass and Broken China to define the country scene then I pulled the square window and landscape masks to reveal a gorgeous square with a little scene on it. I finished the card by stamping a Stampendous sentiment and some Penny Black snowflakes. Easy Peasy!
Sunday, December 2, 2012
Stampendous Hard Core Crop Challenge
All this week Stampendous and Core-dinations cardstock have been having a contest (check it out, deadline is tonight!). I spent most of the week mulling over what I was going to do then my first project turned out "garbage worthy" so had to start again from scratch however I got my project done just in time!
I started my card by embossing the birds with white embossing powder on Coredinations cardstock then I used my Colorbox stylus wand and foam tips and sponged in some Distress ink colors.
Once I was happy with the colors I took a Sizzix embossing folder and embossed the areas around the bird image then sanded the cardstock to reveal the lighter core then I went back in around the edges and added more Fired Brick ink. I stamped my Stampendous sentiment on an extra scrap of Core cardstock then ripped the corners revealing the lighter inner color then lightly tapped in a bit of Distress inks.
I made my own tinsel garland using some Stampendous Crushed Glass Glitter and Be Creative tape. I matted my stamped piece on another piece of Core cardstock (again ripped on the bottom) then onto my main cardstock. Finished off the project with a few red pearls. Love how I managed to use a non-Christmas image on a Christmas card.
Thanks everyone for stopping by!
Card Recipe:
Stamps: Stampendous Bird Frame & Tis the Season (clear set)
Paper: Core-dinations Beach and Roasted Pepper
Ink: Versafine Vintage Sepia, Distress ink Fired Brick, Gathered Twigs & Wild Honey
Other: Stampendous Champagne Crushed Glass Glitter, Red Pearls, Be Creative tape, Ranger Seafoam white embossing powder & Sizzix embossing folder
I started my card by embossing the birds with white embossing powder on Coredinations cardstock then I used my Colorbox stylus wand and foam tips and sponged in some Distress ink colors.
Once I was happy with the colors I took a Sizzix embossing folder and embossed the areas around the bird image then sanded the cardstock to reveal the lighter core then I went back in around the edges and added more Fired Brick ink. I stamped my Stampendous sentiment on an extra scrap of Core cardstock then ripped the corners revealing the lighter inner color then lightly tapped in a bit of Distress inks.
I made my own tinsel garland using some Stampendous Crushed Glass Glitter and Be Creative tape. I matted my stamped piece on another piece of Core cardstock (again ripped on the bottom) then onto my main cardstock. Finished off the project with a few red pearls. Love how I managed to use a non-Christmas image on a Christmas card.
Thanks everyone for stopping by!
Card Recipe:
Stamps: Stampendous Bird Frame & Tis the Season (clear set)
Paper: Core-dinations Beach and Roasted Pepper
Ink: Versafine Vintage Sepia, Distress ink Fired Brick, Gathered Twigs & Wild Honey
Other: Stampendous Champagne Crushed Glass Glitter, Red Pearls, Be Creative tape, Ranger Seafoam white embossing powder & Sizzix embossing folder
Tuesday, November 13, 2012
Here is another card I got made over the weekend. Quick and easy! Oh and not sure if I mentioned this or not but I bought a Big Shot machine back in September (my Cuttlebug blew up) and I am finding I rarely have to use a metal shim to get "lacy" dies to cut properly! The Big Shot seems to have much more pressure than the Cuttlebug! Love that!
Dies used: Spellbinder Poinsettia & Memory Box Amira Flourish
Embossing Folder: Craft Concept Hexagon Illusions
Stamp by Stampendous embossed in gold.
I added a bit of Hero Arts pink ink to the white poinsettia flower to add a bit of "jazz" and the card was done. Might make a few more of these since they are so quick to make.
Dies used: Spellbinder Poinsettia & Memory Box Amira Flourish
Embossing Folder: Craft Concept Hexagon Illusions
Stamp by Stampendous embossed in gold.
I added a bit of Hero Arts pink ink to the white poinsettia flower to add a bit of "jazz" and the card was done. Might make a few more of these since they are so quick to make.
Tuesday, October 2, 2012
Love and Joy
I taught a private class a week or so back (hi Evelyn, Heather and Marilyn!) and here is one of the cards we did. A card this vintagy is rather out of my comfort zone but I like how it turned out.
I began by stamping the postcard image by Stampendous in black Versafine on white cardstock. I colored the holly leaves with my Prisma pencil crayons and added a bit of blue highlight to some of the snowy areas. I then pulled out my Tea Dye and Walnut stain distress ink pads and applied color around the edges of the piece. I ripped the lower left hand corner of my image. This caused the class participants much distress! LOL I curled up the other left corner then matted the peice onto a red Coredinations cardstock. I used my awl and a piece of foam to poke holes along the bottome of the image. I matted the entire piece onto a piece of Basic Grey pattern paper then added my Hero Arts sentiment and some twine.
Thanks everyone for stopping by.
I began by stamping the postcard image by Stampendous in black Versafine on white cardstock. I colored the holly leaves with my Prisma pencil crayons and added a bit of blue highlight to some of the snowy areas. I then pulled out my Tea Dye and Walnut stain distress ink pads and applied color around the edges of the piece. I ripped the lower left hand corner of my image. This caused the class participants much distress! LOL I curled up the other left corner then matted the peice onto a red Coredinations cardstock. I used my awl and a piece of foam to poke holes along the bottome of the image. I matted the entire piece onto a piece of Basic Grey pattern paper then added my Hero Arts sentiment and some twine.
Thanks everyone for stopping by.
Subscribe to:
Posts (Atom)